In this tutorial, I will explain to you how to secure the network part of your web servers with Crowdsec.
The tutorial is made on Ubuntu 20.04
Crowdsec overview
Crowdsec is an open source tool that allows you to “secure” or rather add a layer of security to your Linux servers (soon Windows too) by detecting network attacks (port scanning, SSH brute force, web content scanning … ) and ban IP addresses.
If you know fail2ban, Crowdsec does the same thing better:
- Consumes very few resources
- Pooling of IP addresses with a database shared between all Crowndsec users
- Easy to use
To facilitate the exchange of configuration entered by users, there is a hub (a kind of marketplace) where you will find configurations to secure your server.
Prerequisites in order to be able to use Crowdsec
One of the prerequisites for using Crowdsec is to have an active firewall (IPTABLE) on your server.
If there is no firewall, Crowdsec will not be able to add a rule to block the traffic.
Before activating your firewall, you must ensure that incoming traffic 80, 443 and 22 are authorized.
Start by checking if the firewall is active with the command below:
sudo ufw statusIf this is disabled, we will start by adding the basic rules for incoming traffic: 22, 80 and 443:
sudo ufw allow 22
sudo ufw allow 80
sudo ufw allow 443
For each rule (command), a confirmation message is displayed indicating that the rule is added.
Now that the rules are created, activate ufw:
sudo ufw enableThe command requires confirmation
Now that ufw is enabled, enter the command below to display the status and list of rules:
sudo ufw status verbose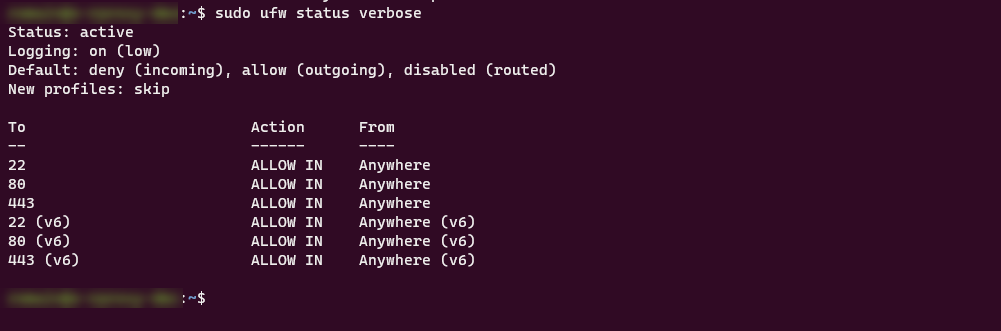
One last thing to do before installing Crowdsec is to activate the firewall logs, because they will be analyzed in order to detect attacks.
Enter the command below to activate the logs:
sudo ufw logging onThe command returns : Logging enabled.
The logs are saved in the file /var/log/syslog.
To ensure that the logs are correctly recorded, from another server, we can launch a telnet on an unopened port:
telnet ip 514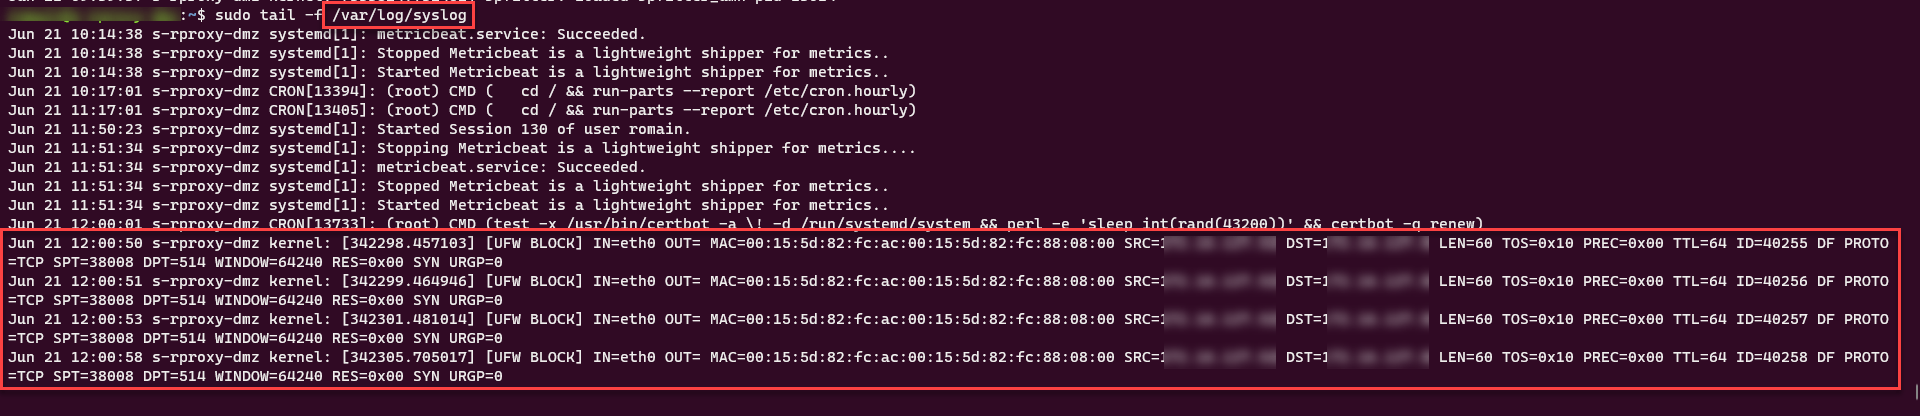
Our server is ready, we are going to install Crowdsec.
Crowdsec installation
The installation of Crowdsec is very simple, during the installation, it will also detect the different components (Nginx, Apache2, MySQL …) that it can monitor and configure itself “automatically”.
1. The installation of Crowdsec is very simple, during the installation, it will also detect the different components (Nginx, Apache2, MySQL …) that it can monitor and configure itself “automatically”.
curl -s https://packagecloud.io/install/repositories/crowdsec/crowdsec/script.deb.sh | sudo bash2. Update the list of packages:
sudo apt update3. Install Crowdsec:
sudo apt install crowdsecOn the screenshot below, the installation process where we can see the discovery and installation and configuration automatically for sshd and nginx.
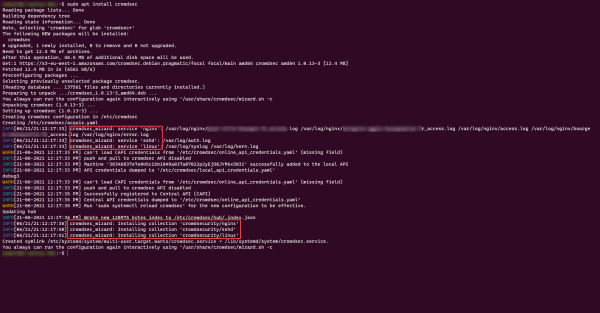
Crowdsec is now installed and “functional”.
Before we move on to configuring and installing a Bouncer, I’ll show you how to interact with the cscli client.
Using the cscli client – Crowdsec
A command line client is available for Crowdsec in order to be able to configure and supervise it.
To display the list of available commands use the command:
cscli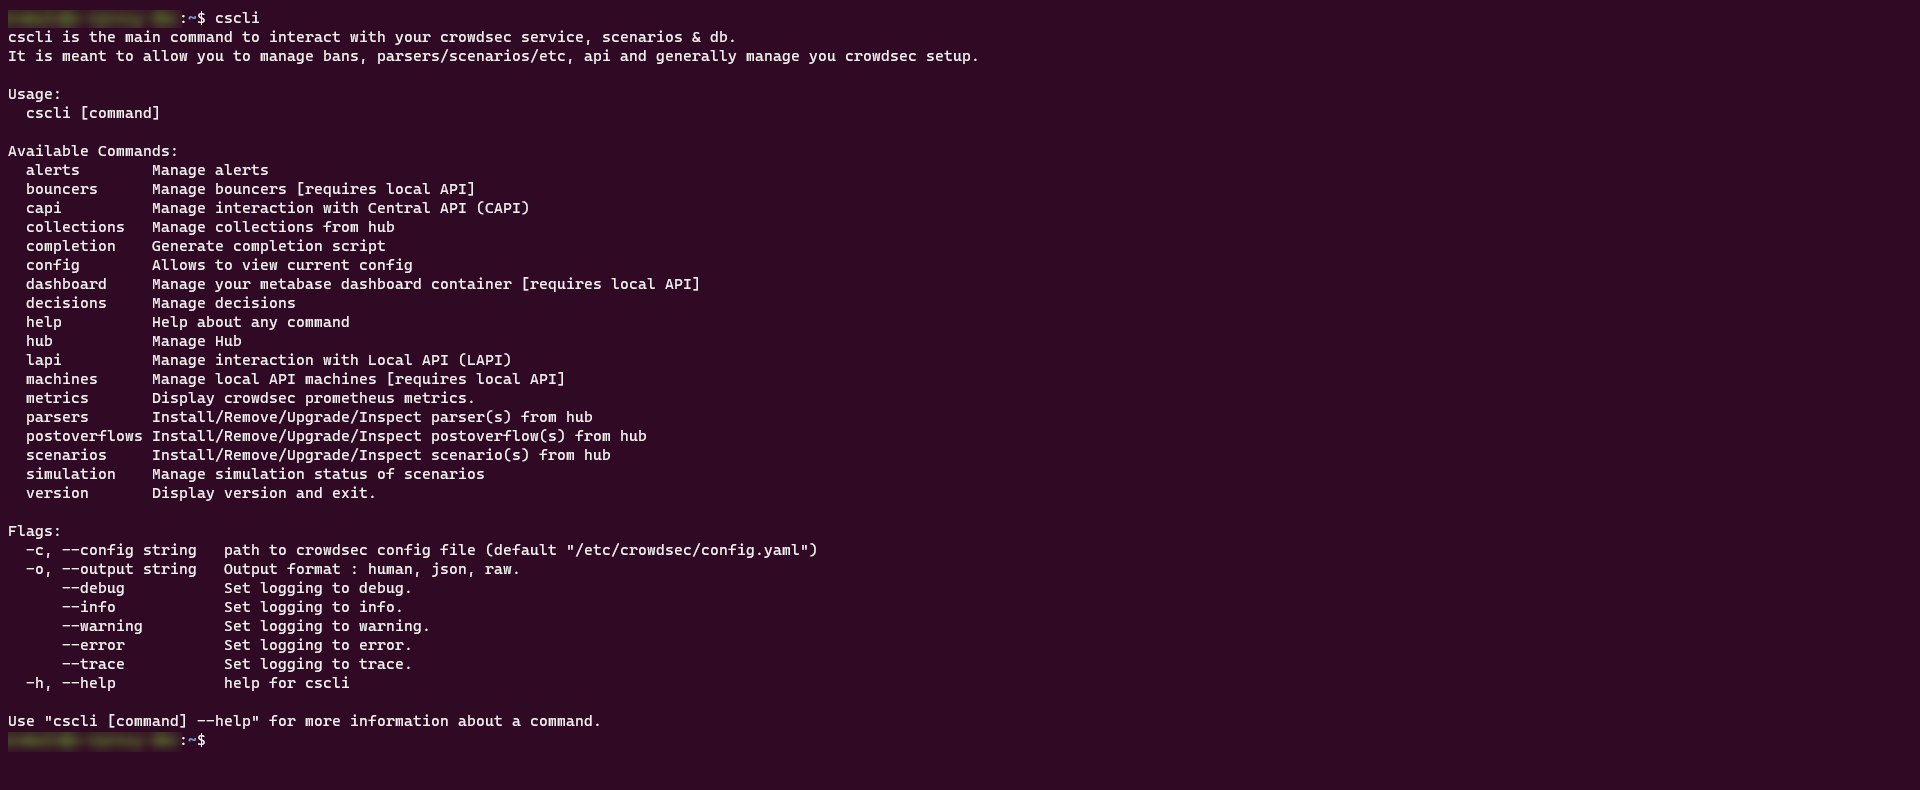
The metric command displays various statistics related to the crowdsec service:
cscli metrics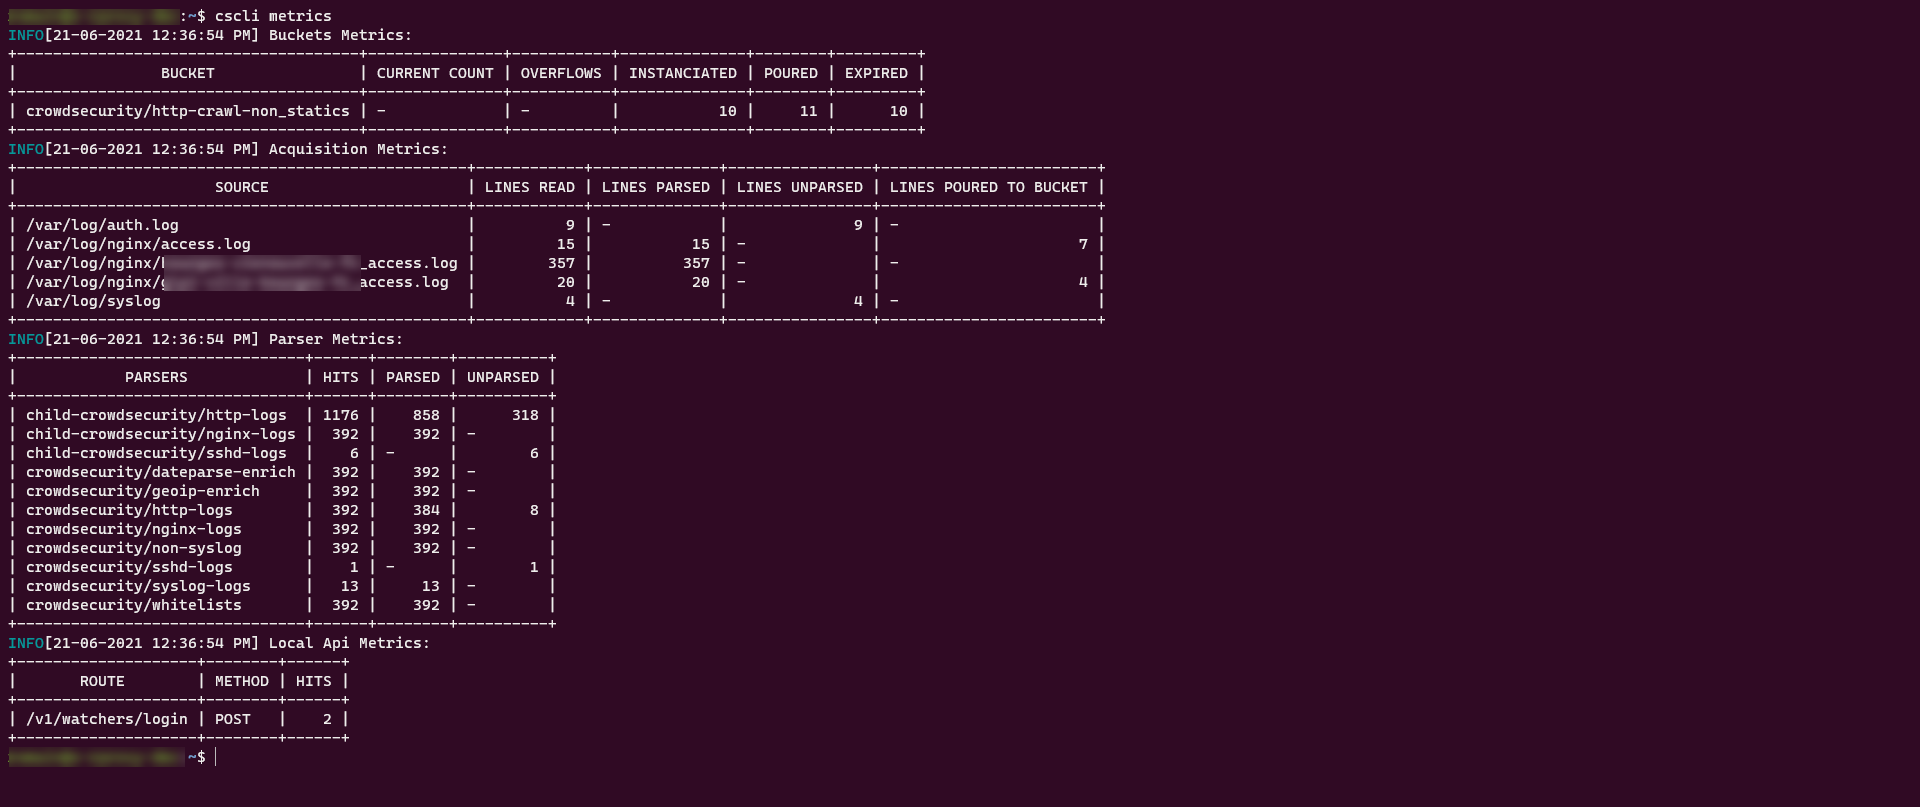
As we can see on the capture, we can see the source files used and their statistics and also the different parsers used which make it possible to detect
To display the logs that have matched a rule:
cscli alerts list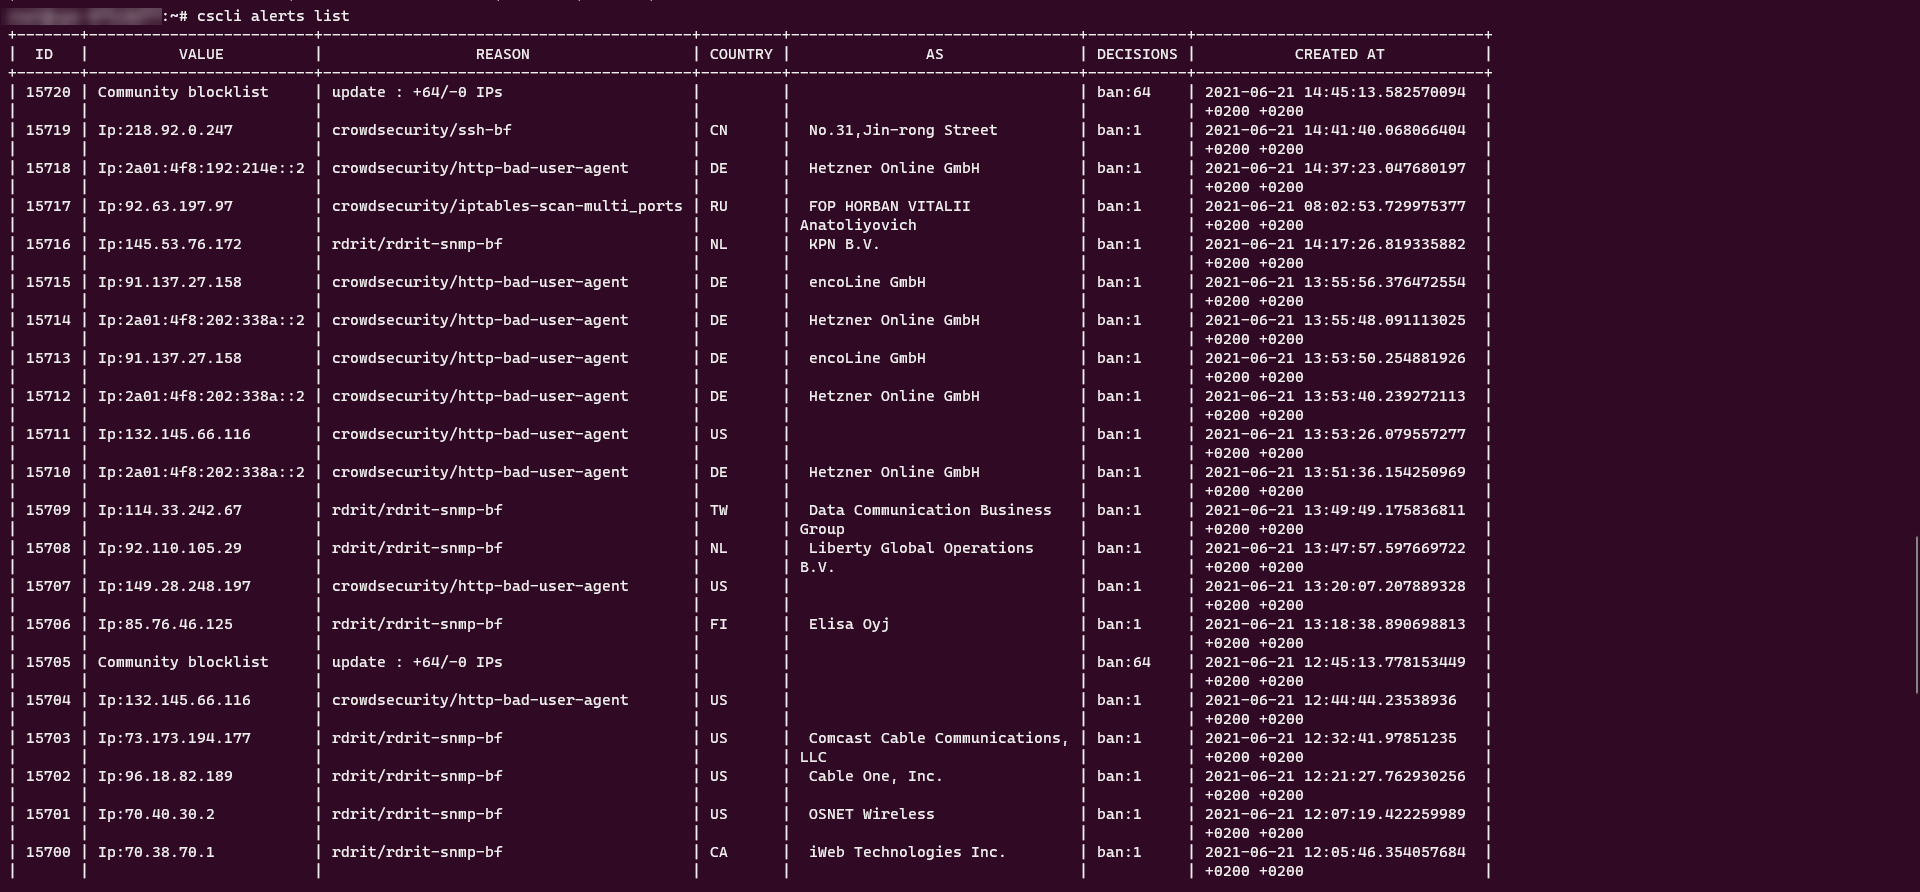
To get the details of an alert:
cscli alerts inspect ID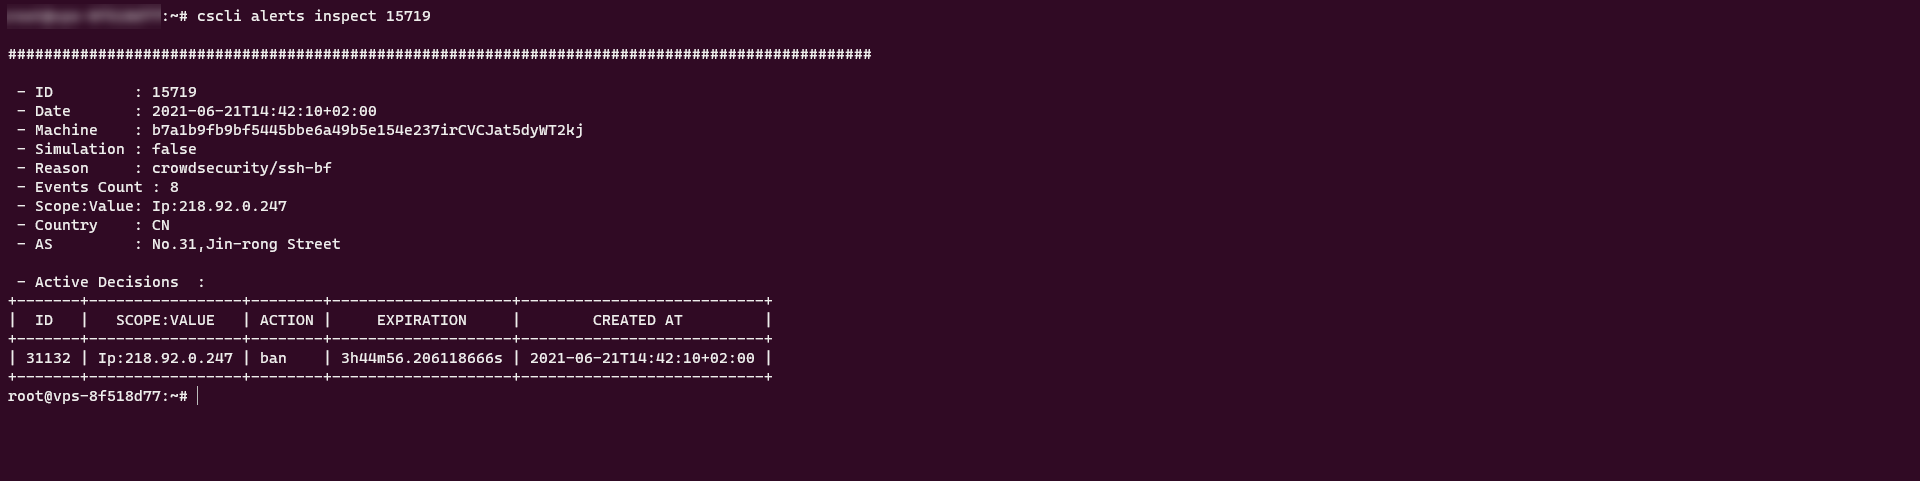
To display the list of bans (blocking):
cscli decisions list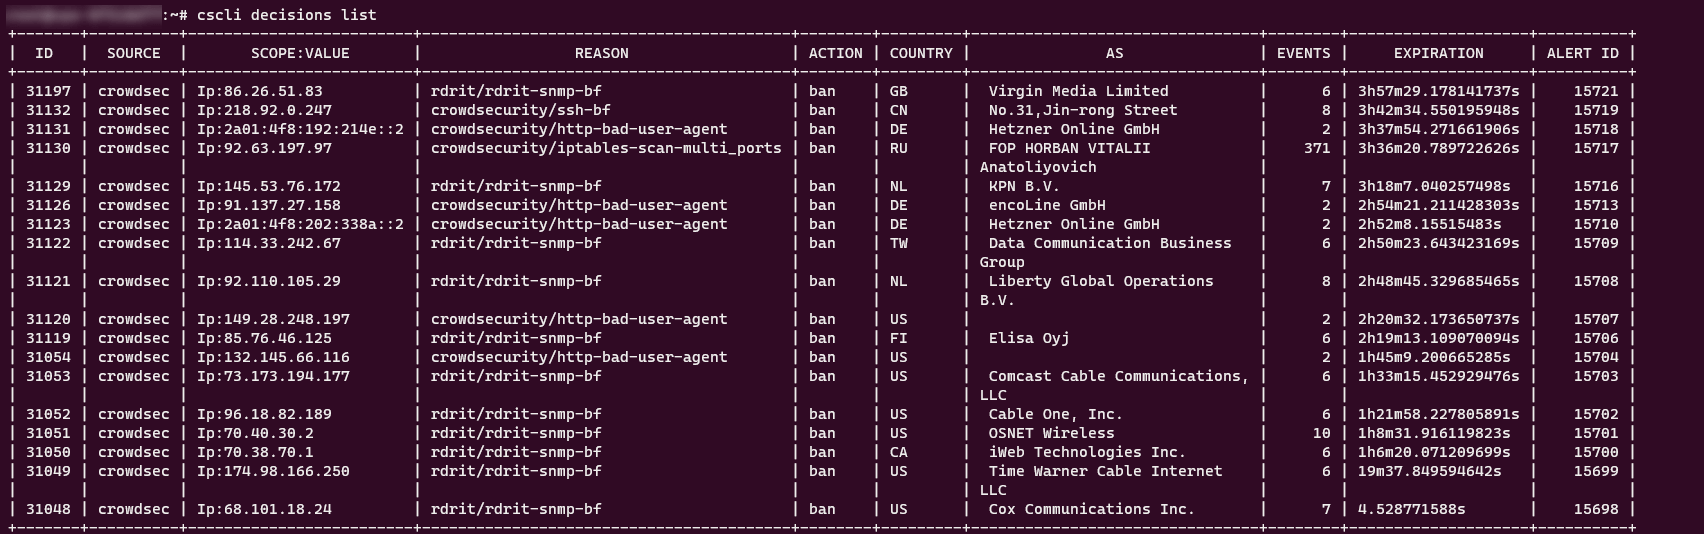
At the moment we still have no Bouncer installed, if use the command yet you will get the following message:
No active decisions.
When we have installed a bouncer, I will explain how to ban a manual ip address and how to remove it.
Display the list of parsers:
cscli parsers list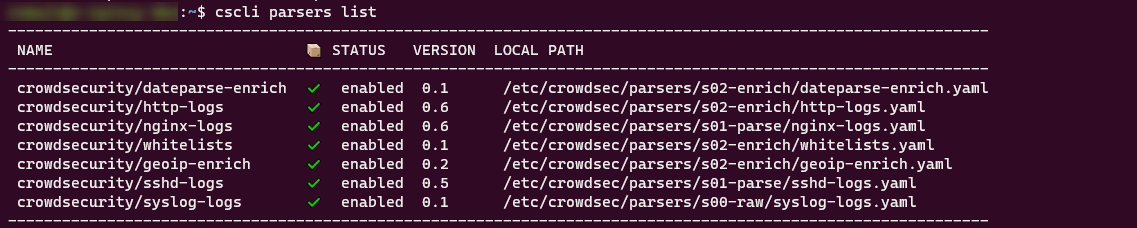
Reminder: the parsers are the configurations that will allow you to read and interpret the logs.
Display the list of scenarios:
cscli scenarios list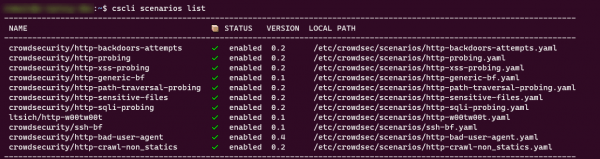
Reminder: the scenarios are the configurations which will detect the behaviors and the actions to be taken.
The last element that we can have is also the postoverflows
cscli postoverflows listpostoverflows are configuration files which contain whitelists to avoid blocking of certain services like CloudFlare, indexing bots …
Install a bouncer
Now, we will see how to install a Bouncer, which will allow us to block attacks.
The list of Bouncers is available on the Hub Crowdsec. There are several blockers available that you can put:
- Firewall / iptable, which allows you to block the server’s firewall
- WordPress using a plugin will prevent site accessNginx
- Cloudflare
- …
In the tutorial, I will explain how to set up the bouncer : cs-firewall-bouncer.
Go to the page at the Crowdsec or Github hub:
- CrowdSec Hub
- crowdsecurity/cs-firewall-bouncer: Crowdsec bouncer written in golang for firewalls (github.com)
The following instructions are valid at the time of writing this tutorial, the bouncer may have changed.
1. Download the sources:
wget https://github.com/crowdsecurity/cs-firewall-bouncer/releases/download/v0.0.12/cs-firewall-bouncer.tgz2. Unzip the archive:
tar xzvf cs-firewall-bouncer.tgz3. Go to the compressed folder (adapt to the version of the archive):
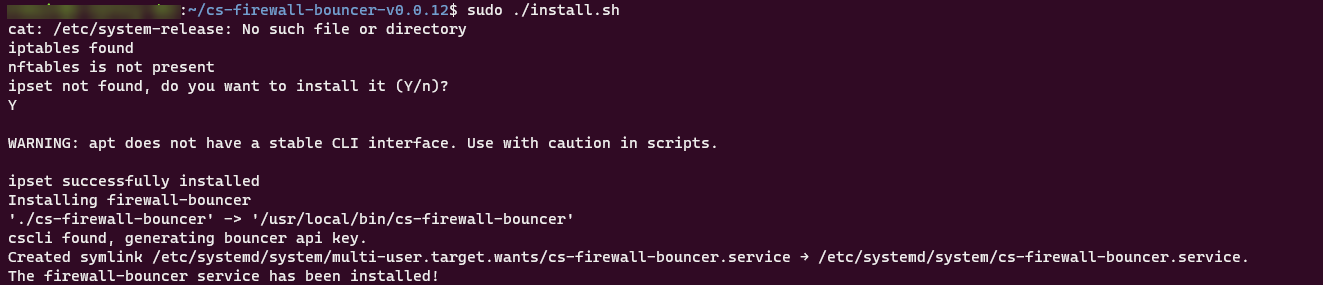
cd cs-firewall-bouncer-vX.Y.ZZ/4. Start the installation script:
sudo ./install.shDuring installation, you will be prompted to install ipset if it is not present.
The configuration of the Bouncer can be found in the file : /etc/crowdsec/cs-firewall-bouncer/cs-firewall-bouncer.yaml.
View the file and verify that it is in iptables mode:
cat /etc/crowdsec/cs-firewall-bouncer/cs-firewall-bouncer.yaml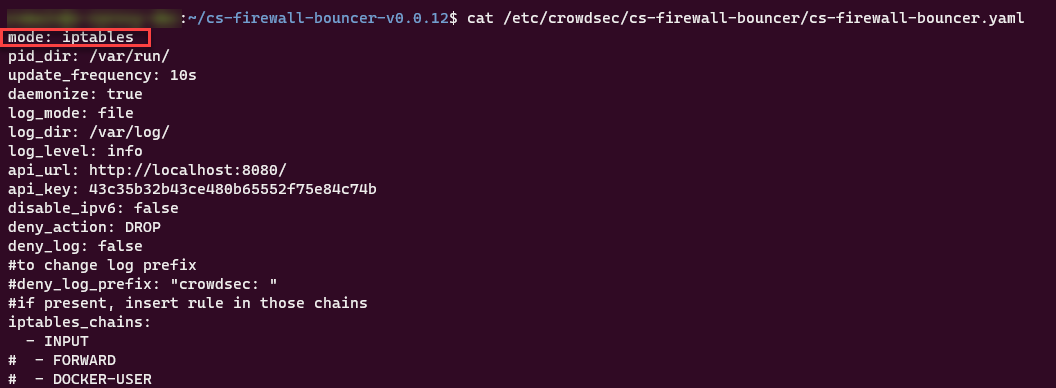
Use the command below to see the Bouncer:
sudo cscli bouncers list
Check the status of the Bouncer:
sudo systemctl status cs-firewall-bouncerFrom now on, attacks will be blocked by the Linux firewall depending on the scenarios.
Install a component with cscli and the hub
In this part, I will explain to you how to install a component of the hub using the client (cscli).
As I installed Crowdsec on a Web server, we will install the white list for the crawlers.
On the configuration page CrowdSec Hub we find the line to execute.
sudo cscli postoverflows install crowdsecurity/seo-bots-whitelistIf you do not use the root account, you must add sudo in front of

Reload the configuration to take it into account:
sudo systemctl reload crowdsecYou now know how to set up a configuration with the client.
There are other commands that allow updating and uninstalling.
Update :
cscli hub updateUninstall:
cscli {composant} remove {nom_du/composant}Act on decisions
It is possible to act on the decisions manually to ban an IP address or to disarm.
Ban an IP address :
sudo cscli decisions add --ip 172.69.32.87The IP address 172.69.32.87 will be blocked for a period of 4 hours.
Ban a 24-hour IP address:
sudo cscli decisions add --ip 172.69.32.87 --duration 24hBan an IP address range:
sudo cscli decesions add --range 172.69.0.0/16To delete a ban, replace add by delete:
sudo cscli decisions delete --ip 172.69.32.87
sudo cscli decesions delete --range 172.69.0.0/16
To conclude
Through this tutorial, you now have all the information you need to install, configure and administer Crowdsec in order to secure your Linux server.
Personally, since I discovered this software, I install it instead of fail2ban, because I really like its community aspect and its ease of use.
More Crowdsec tutorials will follow where I will explain how to add file sources and how to create a scenario.
Finally, know that there is a dashboard available based on a Docker image and that it is possible to use a MySQL / PostgreSQL database to pool decisions to enter several of your servers.